
Natural light is considered the "perfect" ingredient for spectacular photography.
But have you ever stopped to think, "how is natural light used in photography?" We'll let you in on that in a moment! Many factors contribute to stunning photography, but none is more important than natural lighting. In some cases, having good natural lighting can be considered more important than the choice of the subject itself.
The reason?
Light can alter the mood and character of your photos.
It's the single most important factor in photography as it provides images with realism and expression. Quite simply, photographs can't exist without light. But light, on its own, cannot make your photographs look stunning. Knowing how to use natural light to your advantage is what will set your photos apart.
And we're here to help! In this guide, we'll share some golden tips on how to use natural lighting in photography. From boudoir photo ideas to product photography ideas and tips for natural lighting, we'll leave no stone unturned. But first, let's get down to the basics.
Contents
- What is natural light in photography?
- What is artificial light in photography?
- How to use natural light in photography?
- Amazing natural light photography tips
- Differences between natural light photography and artificial light photography
- Natural light vs. studio light: which is better?
What is natural light in Photography?
Natural light refers to the ambient light supplied by the sun or moon—not a camera flash or other artificial light sources. Natural light is also taken to include lights you'd find naturally in the environment, such as street lights, lamps, etc.
Basically, natural light is used to refer to lights that have not been generated by the photographer's equipment in a photo studio.
Natural light photography is when a photographer uses the natural light around them to light photographs.
Photographers, whether amateurs or professionals, often take photos in natural light. For this reason, "natural light photography" was coined to refer to photography that uses natural light from the sun. This also includes smartphone photos taken using ambient lighting.
Hire locations for your next photoshoot with Tutti
Tell us what you're looking for, and we'll send you suggestions within 72 hours. For free!
What is artificial light in Photography?
Artificial light refers to any light that is not produced naturally.

A good example of artificial lighting in photography is when a photographer uses an artificial light source, such as studio strobes, to completely light their photos or add to lights that are already there. These lights can be continuous or strobes that flash when you take a photo.
Artificial light lets you capture photos that would be impossible to handle under natural light. One advantage of artificial light is that you have complete control over your lighting.
How to use natural lighting in Photography?
In photography, natural light can be your best friend or worst enemy. Nail it, and you'll have spectacular photos to showcase your great photo shoot ideas. Mess things up, and no amount of editing will save your picture from poor lighting.
Overcoming the variability challenge of natural light photography begins and ends with your understanding of the sun. The trick is knowing how to work around varying natural light conditions. Follow these steps to capture beautiful photos.
1. Know when to shoot
Time can make a big difference in your photos.
As mentioned, different times of the day will produce different colours and contrast in your images. Time also affects the mood and vibrancy of the photos.
The blue hour
The blue hour is the twilight period (20 minutes before or after the sunset) when the sun is significantly below the horizon. At this hour, the sky assumes a cool blue color that pairs wonderfully with the artificial lights of distant cities.
The golden hour
The golden hour, sometimes called the "magic hour" in photography, is the period of daytime, roughly the last hour before sunset and the first hour after sunrise.
At this hour, the sun is low on the horizon and creates a warm, soft light that highlights the sky and the environment below in a way that is nothing short of magical. The golden hour's soft, warm directional light makes it easier for amateurs and professionals to take fascinating photos.

Midday shooting
The sun is usually at its highest point in the sky at around noon, and the shadows it creates can be extremely harsh. Shooting at midday will do you justice if you want a high-contrast photo. But you need advanced skills to capture fantastic photos in such a harsh environment.
2. Know how to shoot
You can use natural lighting in a photo in three main directions.
The degree of realism and shadow detail you want will depend on your choice of shooting direction. The various directions you can use natural lighting include.
Front lighting
Front lighting shines light directly on the subject. This way, you won't get any shadows, and your photos will look pretty good out of the gate. However, note that front lighting can make the subject look flat unless you angle it to create shadows.
Side lighting
This option is ideal for those who want to explore the creative side of photography. Side light is perfect for emphasizing depth, texture, and patterns. In portrait photography, a 45 to 90-degree angle is applied to create a more 3D appearance of a person.
But for the best results when using side lighting, choose photoshoot locations that can be photographed from a variety of angles.
Back lighting
Backlight is when the light source emanates from behind the subject.
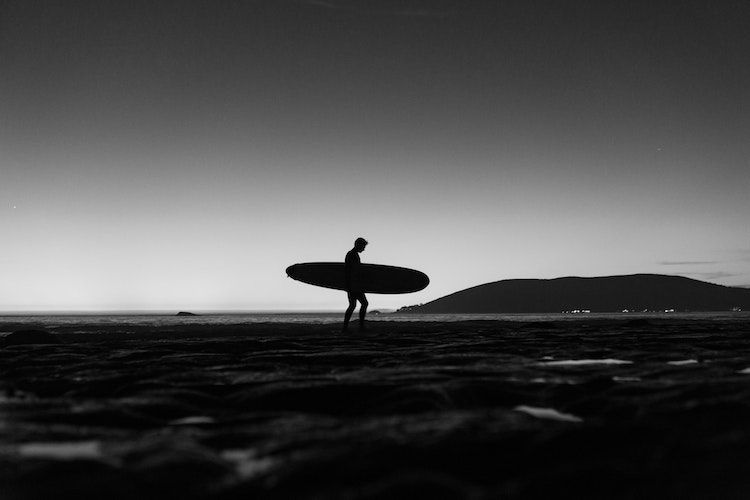
Backlighting is often used to create silhouetted images. If the sun is behind your subject, the subject will appear darker and, in some cases, leaving only the outline of their shape.
3. Modify the natural light
If you find yourself in a natural lighting condition that is not ideal, there are many tools you could use to change or reshape the light that falls on your subject. These include:
Reflectors

In photography, a reflector is an improvised reflective surface that redirects light towards a given subject. It acts as a medium to bounce light and redirects it back to your subject.
A reflector can be artificial or natural.
Natural reflectors include things such as walls, buildings, cars, or any other object that can be used to reflect light back to the subject. Artificial reflectors, on the other hand, refer to specialized equipment you bring to a photo shoot session.
The goal of these reflectors is to bounce light. For example, a reflector can soften shadows created by the sun in portrait photography. When shooting—indoor or outdoor—you'll occasionally encounter some situations that need a bit more lighting. A reflector can help you get that soft light, exposure, or shadow you want in your photos.
Diffusers
A diffuser is a semi-transparent material positioned between a subject and a light source to diffuse the light as it passes through.
Diffusers soften the light and reduce harsh shadows and glare. They remove unattractive contrast and even out the tonality in the image. This allows for better colour saturation in bright and vibrant photos, especially in flower photography.
4. Adjust your camera's settings
When you're done with the hardware side of things, you'll need to work on the software part.
Depending on your lighting condition, you may need to adjust your exposure settings to capture quality shots. For this reason, it's advisable to use manual mode on your DSLR.
If you choose any mode other than the manual mode, your camera will automatically select settings for you. Shooting in manual allows you to control all settings without worrying about wrong automatic settings being applied to your photos.
The key settings you should master to make the most of natural light include:
- ISO
- Aperture
- Shutter speed
- Aperture
Pro Tip: Avoid using flash when adequate light is available, as this will overexpose your photos. Also, invest in a good tripod as it can help you avoid blurry photos.
Amazing natural light Photography tips
Natural light photography is key to producing breathtaking images your audience will love. Use these natural light photography tips to highlight your subject features, evoke emotions, and alter colours to give your photos a balanced look.
1. Use the weather to your advantage
A common mistake most beginners make is thinking they can't take quality photographs during harsh weather conditions.
The truth is, you can capture breathtaking photos during harsh weather conditions as long as you know your way around natural lighting photography.

Sometimes, the best shots are the ones taken when the weather is off.
For instance, fog, raindrops, and cloudy skies can help you to create dark or creepy vibes. Picture a strong wind, a cloudy day, rainy afternoon—these harsh conditions can be all you need to capture breathtaking moments.
2. Find the best angle
Your shooting angle can make or break a photograph.
Depending on how you angle your subject to the sunlight, you can create or remove shadows. Finding the perfect angle can also help highlight some features of a subject.
For instance, if you want the natural light to only shine on one part of the subject, like their hair or face, you'll want to turn them towards or away from the sun at a certain angle. By controlling how the sun hits the object, you can highlight specific aspects of the subject.
3. Work on your camera's white light balance
Sometimes, light looks cold and blue. Other times, it looks toasted and golden.
While our eyes naturally adjust so that colours can look the same in different lights, cameras use a setting called white balance.
White balance adjusts how your camera sees the light, allowing you to control the tones of the light you're working with. You can configure your camera to compensate for light that's too cold or too warm. Most DSLRs come with seven standard settings for white balance, with the Auto White balance being the default.
If you're shooting in direct sunlight, change the white balance to Daylight mode. If shooting in outdoors, Fluorescent or Tungsten can help balance colours.
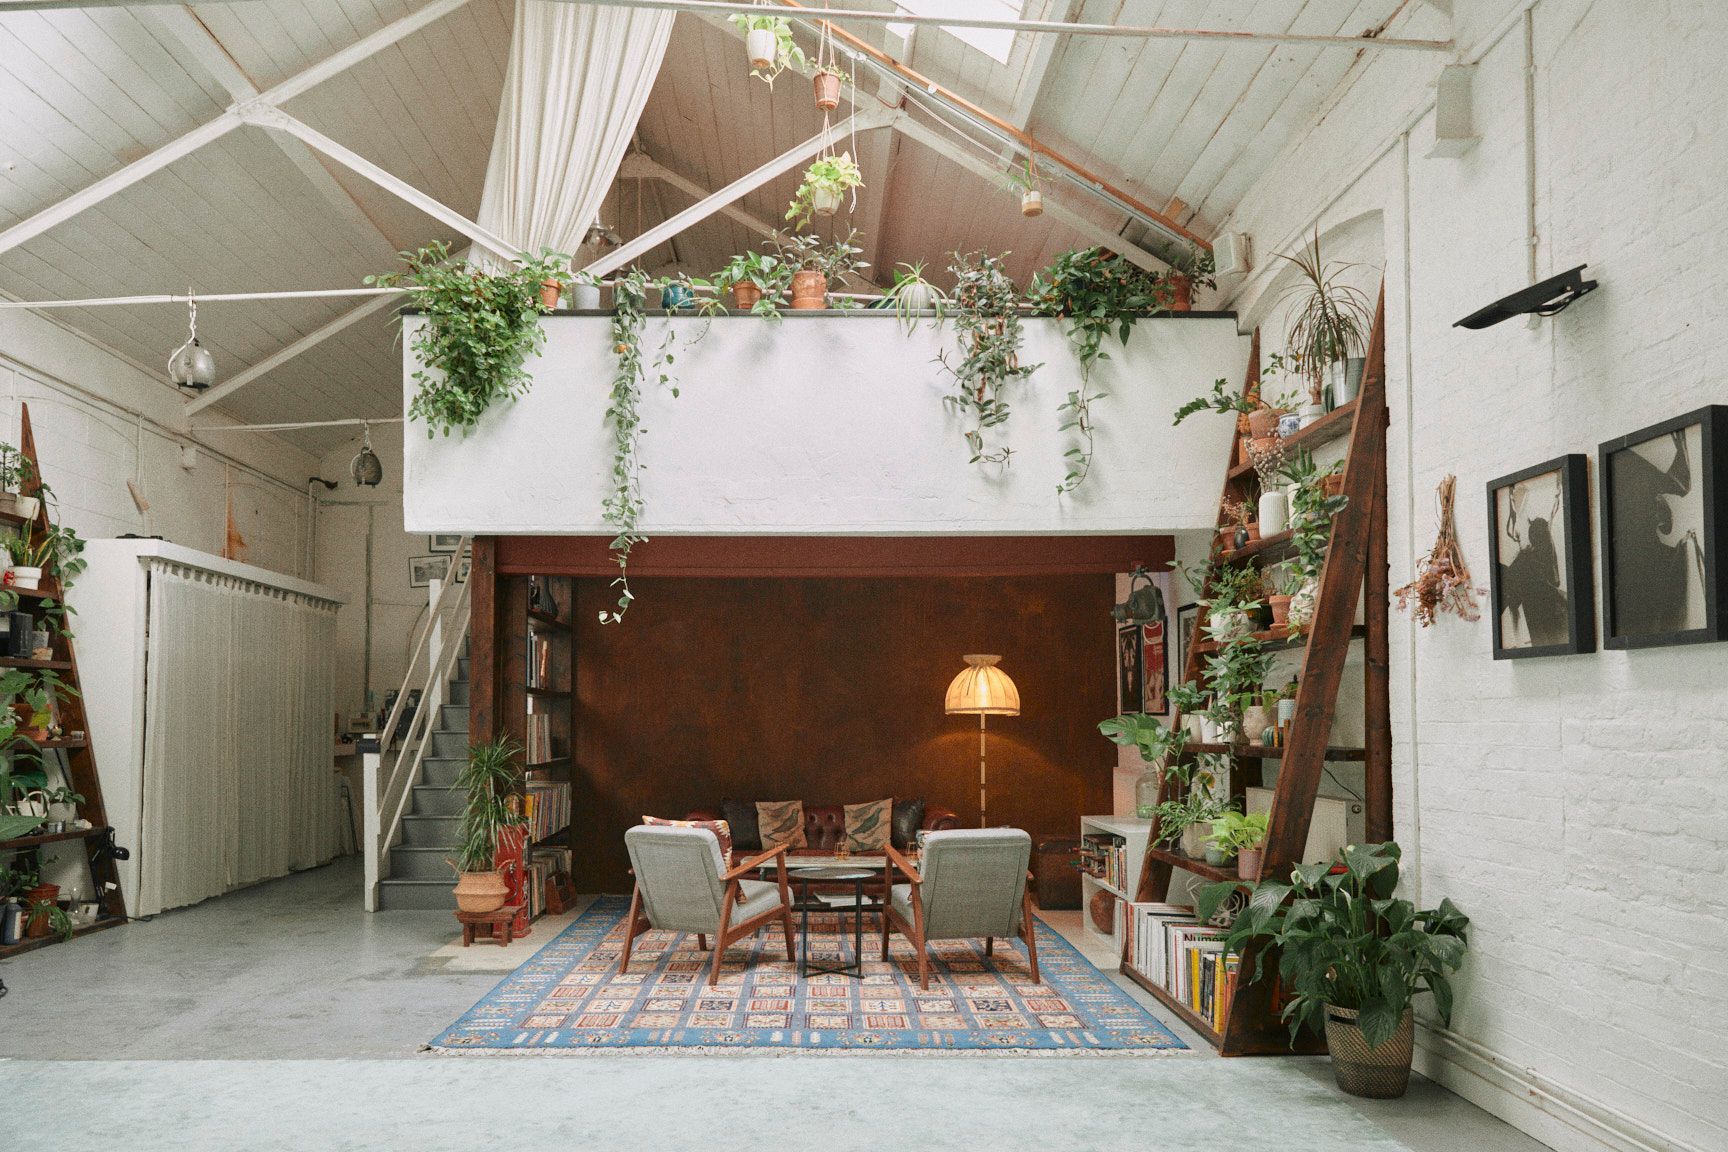
4. Find the right lighting condition
Finding the right lighting condition is critical when it comes to shooting and editing photos for e-commerce and product photography.
Different products will require different lighting conditions, and you’ll have to figure out what works best for your products.
The first thing you'll want to do is determine your product photography lighting setup.
If natural lighting through the windows isn't enough, you'll need to include artificial lighting in your photo equipment. Here are some options you could try out.
- Strobes
- Flashguns
- Continuous lights
- Overhead lights
- Ring lights
If natural light through the window is the ideal solution, make sure to observe the time of the day and the weather. Avoid full sunlight as it may overexpose your photos. Explore London's daylight photo studios offering spaces with lots of natural light.
5. Shoot at the golden hour
As mentioned, the golden hour is the last hour before sunset and the first hour before sunrise.
Photos taken at this time of the day have an almost magical quality that distinguishes them from other photos, taken at different times. The light at this time gives your photos a soft, golden tint that artificial light can't replicate.

Still, backlighting can pose a challenge, especially if it's your first time shooting at the golden hour. The solution is to spot-meter your subject. Spot metering is a camera setting that allows your camera to measure the light reflected from a selected area, like a person's face, and expose it properly rather than adjusting exposure for the entire photo.
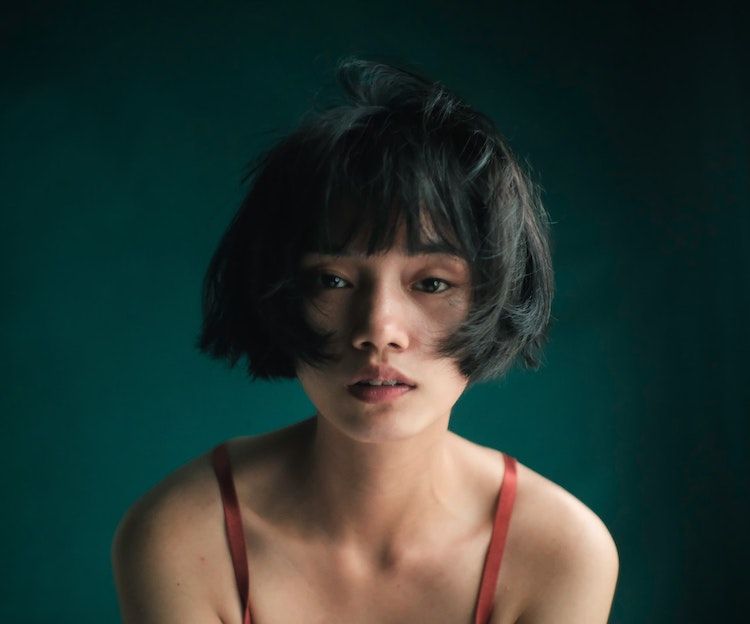
6. Avoid direct sunlight for portraits
Direct sunlight, particularly at noon, can produce harsh shadows which might not impress the people in your shots.
So, it's advisable to avoid taking portrait shots in direct sunlight. Our advise for portrait photographers is try photographing people in the shade on bright days or wait until afternoon or evening when the sun produces a warmer light.

For example, standing underneath a tree or behind a building can diffuse the harsh light and produce better-looking portraits for your individual and family photo shoots.
Differences between natural light Photography and artificial light Photography
The biggest distinction between natural and artificial light photography is in the light source.
In natural light photography, natural light from the environment lights up the photos. Artificial light photography, on the other hand, uses artificial light sources such as studio lights and strobe lamps to light the photos. Let's enumerate their key differences.
1. Light availability
In natural lighting, lighting conditions vary with time and weather. These are things you have to account for if you're working in an outdoor photo studio.
In contrast, an artificially-lit studio will have a light source at any time of the day or night. Unlike natural lighting, artificial lighting is not affected by weather changes.
2. Control over the lighting source
Natural lighting is difficult to control as its outcome depends on the forces of nature. However, some forms of natural lighting, like street lights, can be controlled with some levels of difficulty.
By contrast, artificial lighting is easy to modify and direct. You can adjust studio lights to fit your lighting needs at any time of the day or night, and even use them to fake natural lighting in your photography. In this regard, artificial lighting is more predictable and preferred for photographers who don't want a re-shoot.
3. Use cases
Artificial lighting can produce great photos when it comes to portraits and nighttime photography outside.
In contrast, natural lighting is ideal for outdoor photography. It produces breathtaking photos of landscapes—and is preferable in many genres such as street photography that would otherwise be difficult to capture with artificial lighting.
Natural light vs. studio light: which is better?
Many photographers are faced with this question at some point in their life.
But which one should you use; natural light or artificial light? Well, there's no right or wrong answer to this question. Each has its strength and weaknesses, and in most cases, you'll find yourself using both for your shooting needs.
The benefits of using natural lighting are that it's free, abundant, and available everywhere. You don't have to invest heavily in lighting equipment to pull off gorgeous photos. All you need is a camera, and you can begin shooting immediately.
Most importantly, it produces the best landscape photos, and means that you can easily use the world around you as your backdrop. Check out the best places to photograph in London for some inspiration.
If you're planning an outdoors expedition, you'll need more natural light than artificial lighting. An outdoor photographer can also create outdoor portraits that look just as compelling as something captured indoors.
On the downside, natural lighting can be challenging to use for the fact that the sun varies greatly. Plus, there's a steep learning curve to using natural lighting.
Natural lighting can produce different colours and contrasts in your images depending on the weather, season, location, and time of the day.
For example, midday sun tends to produce contrasty images with neutral white colours, while shooting at the golden hour result in medium contrast and war colours.
What about artificial lighting?
If you love manipulating and controlling every aspect of your photo, you'll love artificial lighting more. Its biggest advantage is that you don't have to plan your photoshoot around the weather. A professional photographer can replicate sunlight or moonlight to create images that appear to have been shot with natural lighting. Artificial lighting also opens up great opportunities to create high key and low key lighting photography.

Even if artificial light offers more control over your lighting, it requires additional gear, making it more expensive. For more information on studio photography gear, check out our photo studio equipment guide.
Plus, some lights have tricky settings that can mess up your photos if you don't know how to work around them.
Wrapping up
Natural light refers to the ambient light supplied by the sun or moon—not a camera flash or any other artificial light. It differs from artificial light in that the latter uses an artificial light source, such as studio strobes, to light the photos.
Natural light photography produces breathtaking photos ideal for any occasion.
The first step in mastering natural light photography is knowing how to work around varying natural light conditions. This can be achieved through learning when to shoot, how to shoot, and how to modify the natural light using reflectors or diffusers.
Looking for inspiration? Check out our top London Photography Exhibitions
Hire locations for your next photoshoot with Tutti
Tell us what you're looking for, and we'll send you suggestions within 72 hours. For free!


