
Product shots are the first thing we see when we shop online. A product photo is how we decide whether to check it out or move on. A killer product photography idea with a ‘meh’ marketing copy has more chances of selling than a ‘meh’ product shot with a killer marketing copy. Why is that?
The reason is simple. Humans are subconsciously wired to favour beautiful objects. And when we see a good product shot, we automatically assume the product to be just as striking, and we go for it. And it’s not us saying this, but consumer psychology research found that the “aesthetics” of a product photo was one of the four factors upon which consumers base their purchase decision.
The same study also identified buyers prefer unique product photography with:
- A larger key object — The product dominates the composition and takes up more than half of the frame.
- Lower entropy on key objects — objects in the photograph are not as chaotic. This is usually achieved by reducing the number of objects in the photo.
- A warmer colour — A warmer colour palette evokes a sense of warmth and comfort.
- Higher contrast — It makes the image more eye-pleasing and the colours pop.
- Higher depth of field — It puts a greater degree of focus on the product.
In this article, we are going to talk about some creative product photography photo shoot ideas and tips that will help you create stunning and effective product shots that have all the five above-mentioned characteristics. The prettier your product shots are, the more your photography clients will sell their products. The more satisfied they are with your images, the more likely you are to increase your client base. While it may seem obvious, this is the most crucial aspect of marketing yourself as a photographer: perfecting your skill!
Once you've nailed down your concepts and production plan using this article, you can brush up on our guide to shooting and editing great eCommerce photos and how to build a photography website, so you can start reeling in those clients!
Where to start
In order to create unique product photography, there are three things you should consider: the subject, your product photography lighting setup, and the scene. Think of a product shoot as an orchestra, where all the visual elements of the product shot — the product, props, background, lighting, textures — are the musicians, and you are the maestro. The trick to getting outstanding product shots is to use all the visual elements in creative ways to achieve unique product photography.
Let’s open the aperture and focus on 15 unique product photography ideas.
Product photography ideas
1. Play around with angles
The world of product photography is full of interesting techniques that you can learn to create unique and stunning images. Traditional nuggets of photographic wisdom dictate that you should never take pictures from unconventional angles. It distorts the images, and it’s more likely that photos will turn out wonky. But we digress. Shooting a product from unusual angles can deliver some exceptional results. You can even ditch the tripod entirely and go hand-held to experiment with angles. It is possible that one of the angles may suddenly click and produce a shot that you previously couldn’t even imagine would look this good.
Shooting from unusual angles will also work well if you are gunning for a distorted aesthetic. For instance, shooting from a low angle or taking photos from the side can create a distorted perspective and make for a captivating, eye-catching shot. But keep in mind that you can only get away with your “fun time with angles” if your product appears good when it’s warped. This means that apparels and food items are out of the question, and so are jewellery items and books.
Pro-tip: If the product is of small size, combine a high aperture of f/1.8 or f/1.4 with a shallow depth of field to get some really wacky but stunning product shots. If the product size is large, experiment by pairing up a low aperture of f/16 or f/22 with a high depth of field.
2. Capture your product in motion
There is nothing more exciting than capturing a product in motion. It instantly grabs the viewers’ eyeballs and creates an impact on their minds.

For instance, you may want to capture a moving vehicle or a drone taking off. By choosing amazing photoshoot locations and combining them with natural light photography you can master the art of capturing motion in your photographs and bring any of these scenes to life. But simply wanting to convey that a product is in motion is not enough. You also have to choose the aesthetic that you are aiming for.
To blur or not to blur
The element of motion in a photograph invokes a sense of thrill in the minds of the viewers. If that's the mood you want to create, you should try to blur the background. How much to blur depends upon how fast your product is moving. In other cases, you may even want to pause everything or make everything blurry. The creative goal you have in mind for your photograph should influence your choice.
Pro-tip: You will need to play around with three camera settings to capture your subject in motion:
- Shutter speed – The more you drop it, the more blur it will produce. The more you increase it, the clearer and crisper your images will be. For instance, a high shutter speed of 1/1000s will completely freeze the frame and capture everything in motion, while a slow shutter speed of 1/32 will blur everything.
- Aperture – If you're shooting at a fast shutter speed, you will also need to widen your aperture to let more of the light in. Keep your f-stop numbers in the lower range and keep trying f-stops until you are satisfied with the brightness.
- ISO – Keep tabs on the noise and the brightness. If you notice your image washed out or noisy, try dropping the ISO until you get it right.
3. One second to impact
If you want to highlight the durability of the product, what better way than showing it actually falling. The hard part, however, is to decide when to capture the shot. If you take the photo at the moment of impact, it won’t appear realistic. It will seem like you simply placed the product on the ground. On the other hand, if you capture the product too high up, it will seem like the product is floating — also equally ineffective.
But if you capture the product about one second before it hits the floor, you will produce a product shot that not only looks outstanding but is also believable.
Pro-tip: Capture the falling product at the eye level of your camera, such that the ground and the product are both visible in the same frame. Also, ensure that you are using a background that contrasts with the colour of your product.
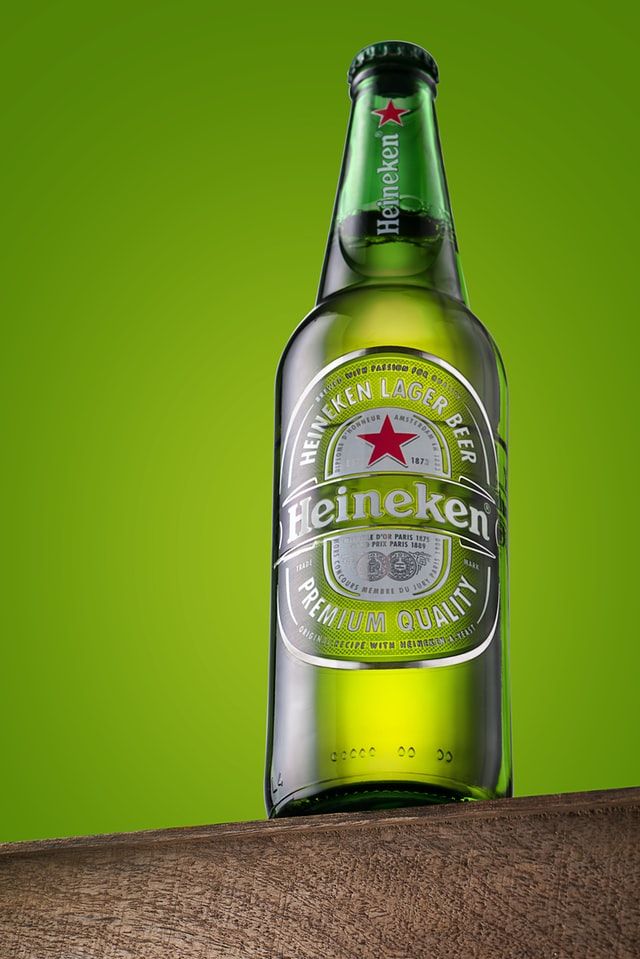
4. Let your product define your scene
Pairing a pint of beer with a flower vase and placing them on an office desk will produce an image that looks all sorts of weird — and not in a good way. The same goes for the props and backgrounds. Your choice of props and backgrounds must make sense. Pairing beer with a tumbler makes sense. Placing them on a bar table makes even more sense.

Filling up the set with props related to your product will help you create a stunning, professional product shot. Just make you sure don’t fill up your scene with every related product. Remember the adage that clutter is the enemy of clarity? In product photography, it’s the enemy of focus.
Find product photography studios with Tutti
Choose from 1000+ spaces and locations and deal directly with space hosts for a quick, hassle-free booking process.

5. Choose a background that plays well with the product
Backgrounds ideas for product photography matter. If you really want to make the product jump off the images, you have to be very extra selective with the choice of your photography backdrop, lighting setup and the elements you put there. If the background is too busy, it's very difficult to spot the product. If your products are difficult to spot, they're not going to jump off the page.
Instead of using a white background for — a white-coloured sunscreen tube, for instance — how about trying out a yellow or a purple-coloured background? You can use the brand colour or the colour of the fonts and use it for the background. This will not only make your background complement the foreground but will also bring a sense of harmony between your subject and the backdrop.
6. Get rid of those pesky reflections
Shooting reflective products can be a nightmare. Tweak one thing here, and you break something elsewhere. You have to set your camera in a particular way and place your lighting setup just right. One way to shoot reflective products is with a softbox on one side, and let the light come in from the other side. The softbox will provide a shadow on the other side of the product. If dealing with a large-sized product, you can also use an umbrella.
Pro-tip: Get a bunch of bounce cards. Place them wherever you see bad reflections and bounce that part of the light away. Just ensure that the bounce cards are always in the direct line of sight of your light source.
7. Let it shine
Reflections are not always bad. When dealing with shiny products such as jewellery or wristwatches, you will want to capture the razzle-dazzle of these products. So, just let the reflections be. You may only need to make some minor fiddling and tinkering with lights, umbrellas or softboxes, and you will be raring to go.

Reflective surfaces of certain products can make your photographs appear three-dimensional and give the image a burst of colour. When photographing reflective surfaces, you'll need a variety of angles and other creative techniques to get stunning results. You can dabble with angles and explore your creativity to find amazing shots.
Pro-tip: Use a cinefoil to shape your light the way you want. Club it with a reflector or a barn door, and you can get even more precise with your lights.
8. Ditch colour filters
If you want your product shots to be an accurate representation of how the product looks in real life, ditch the colour filters. Yes, colour filters stylise the image, and yes, the pictures look great. But colour filters alter the colours of the product. You certainly do not want your client to face product returns from customers on the account of “product not looking the same as in the photos.”
While some might argue that the aspect of colours is something that you can correct and fix in post-production — but then why use the filters in the first place? We recommend going “vanilla” on your lenses and shooting without colour filters. This way, you can preserve the colour composition. And besides, there is always Photoshop and Lightroom to help you get the look that colour filters would have got you.
9. ‘Sweep’ your white backgrounds
It is not enough to simply press a table up against a white background or a wall and expect to get satisfactory results. Even smartphone cameras can detect unsightly marks on white walls that the naked eye would miss. The best way to work around this is by using a sweep.
A sweep is a large sheet of paper that is bendable and acts as a surface beneath your product before curving up to form a white wall behind the product. It will give you a background that is totally white and free of any corners or other flaws. The underside of the sweep will act as the surface upon which your product will rest. The sweep's curve is not visible when it is captured on camera, and it delivers a professional-looking background and finishes to the product shot.
10. Fix your white balance
The whites in your product shots should remain white. You might be tempted to experiment with white balance to make your product shots stylish but resist the urge. Calibrating your cameras with the wrong white balance will make the colour temperature in your photograph go out of whack and the colours look unnatural.
White balance is determined by the camera's perception of what it thinks is correct, but this may not always be the case.
Images taken in natural light often have a blue cast to them. “Auto” is the best white balance setting to use when photographing in natural light.
Pro-tip: You can get an accurate reading of the white balance by placing a grey card in front of your camera.
11. Go macro
If you want to capture the finer details of your products or the texture, swap out your regular lens for a macro lens or switch to macro if your camera supports it. Macro lenses have such a shallow depth of field that even the slightest movement can cause the image to become blurry and out of focus. A lack of image stabilization will result in a shaky image. You will need to make use of a tripod of high quality to keep your camera steady while you are taking photographs.
Pro-tip: Rather than simply photographing your product from the front, try to angle the image, preferably at a 45-degree angle. You will be able to capture more of the product in your shot.
12. Make it float
Suspending your products will help you achieve a riveting three-dimensional perspective to your shots. You can play around and knock yourself out by taking shots from whichever angle you want. It’s also just as easy to do. You can use a rope, a wire, or even a line to hang your product in the air. You can always remove them later in a photo editing software like Photoshop.

Pro-tip: Use acrylic rods to hold something in the air. They are transparent and can be easily removed in post-production.
13. Shoot Raw
If your product shots are going to get printed in a glossy catalogue, consider shooting them in RAW. RAW is an uncompressed file format that allows images to be processed at their largest image size by the camera sensor without any automatic adjustments. When you shoot in RAW, you will be able to make any number of adjustments, and there will be no loss in quality. It also boasts the largest spectrum of colours and captures and preserves the most details among all image formats.
14. Rent a studio
A portable photo studio setup can be very effective, however, renting a studio is a no-brainer if you have to fill up a large photo order for a catalogue of products. Photoshoot locations and studios come in all shapes and sizes and finding one that suits your needs and accommodates your specific photoshoot concept will be easy. A photo studio will give you plenty of room to take pictures and access any props that could make your product photos more eye-catching. Explore photo studios in your budget in your city like these brilliant product photo studios in London. Consider reading our photo studio equipment guide if you need help with equipment
15. Use a computer
Another advantage of working in a photo studio is that it allows you to hook up your camera to a field monitor or your computer. That means you can see exactly how images will appear in real-time and see the effects of the changes you make on-the-fly.
Instead of your LCD camera screen, the product photos will appear on your screen. This allows you to examine the photo in greater detail. You can see if the product is in focus, how the lighting setup affects it, and if there are any adjustments you need to make. This is an excellent way to work if you're shooting and editing at the same time with an assistant.
Need more ideas?
We at Tutti are here to assist you if you're having trouble with product photography inspiration or finding suitable locations for your photoshoot. We're a marketplace that connects creatives with stunning workspaces. Don't hesitate to contact us if you have any questions about Tutti!
Find product photography locations with Tutti
Choose from 1000+ spaces and locations and deal directly with space hosts for a quick, hassle-free booking process.


